Se hai un abbonamento attivo ACCEDI QUI
Introduction:
Kefir, a fermented milk drink, has gained immense popularity due to its probiotic benefits and nutritional value. While many people enjoy purchasing kefir from stores, some enthusiasts are curious about making their own kefir at home. One common question that arises is whether store-bought kefir can be used as a starter culture for homemade kefir. This article delves into the intricacies of using store-bought kefir as a starter, examining its feasibility, potential challenges, and best practices to ensure a successful fermentation process.
Understanding Store-Bought Kefir Basics
Store-bought kefir is a convenient option for those who want to enjoy the health benefits of kefir without the hassle of making it from scratch. It is typically produced by fermenting milk with kefir grains or a powdered starter culture, resulting in a tangy, slightly effervescent beverage rich in probiotics. Commercial kefir is often pasteurized before fermentation to ensure safety and consistency, which can affect its suitability as a starter culture.
The ingredients in store-bought kefir usually include milk, live active cultures, and sometimes added flavors or sweeteners. The live active cultures are essential for fermentation, as they contain the beneficial bacteria and yeast responsible for transforming milk into kefir. However, the concentration and diversity of these cultures can vary significantly between brands, impacting their effectiveness as a starter.
Another factor to consider is the shelf life of store-bought kefir. As a perishable product, kefir’s probiotic content can diminish over time, especially if it is not stored properly. Freshness is crucial when using store-bought kefir as a starter, as older kefir may not contain enough viable cultures to initiate fermentation effectively.
The pasteurization process used in commercial kefir production can also influence its suitability as a starter. While pasteurization kills harmful bacteria, it can also reduce the number of live active cultures. Some brands may add additional cultures after pasteurization to compensate for this loss, but the overall effectiveness can still vary.
Lastly, the type of milk used in store-bought kefir can affect its performance as a starter. Kefir made from cow’s milk, goat’s milk, or plant-based alternatives like coconut or almond milk can have different microbial compositions, which may influence the fermentation process when used as a starter.
Key Differences Between Kefir Types
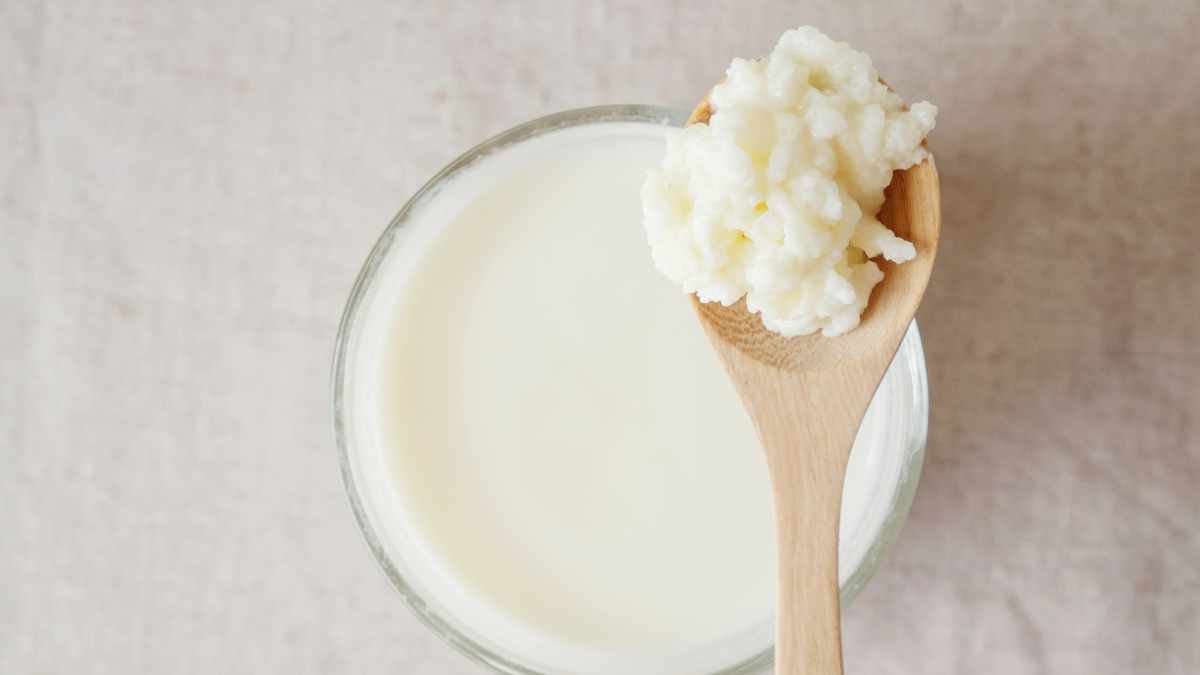
Understanding the differences between various types of kefir is essential when considering using store-bought kefir as a starter. Traditional kefir is made using kefir grains, which are a symbiotic culture of bacteria and yeast (SCOBY). These grains are reusable and can ferment milk repeatedly, producing a consistent and robust kefir.
In contrast, some commercial kefirs are made using a powdered starter culture instead of grains. These powdered starters contain a specific blend of bacteria and yeast designed to mimic the fermentation process of kefir grains. While convenient, powdered starters may not provide the same microbial diversity as kefir grains, potentially affecting the quality and consistency of the homemade kefir.
Another distinction is between dairy and non-dairy kefir. Dairy kefir is typically made from cow’s or goat’s milk, while non-dairy kefir uses plant-based milks like coconut, almond, or soy. The microbial composition of dairy and non-dairy kefir can differ significantly, influencing the fermentation process and the final product’s taste and texture.
The fermentation time and temperature can also vary between kefir types. Traditional kefir made with grains usually ferments at room temperature for 24-48 hours, while some commercial kefirs may have different fermentation requirements. Understanding these differences is crucial for replicating the fermentation process at home.
Flavor and consistency can also differ between store-bought and homemade kefir. Commercial kefir often undergoes additional processing to achieve a uniform taste and texture, which may not be present in homemade kefir. This can result in variations in the final product when using store-bought kefir as a starter.
Lastly, the probiotic content of kefir can vary between types. Traditional kefir made with grains typically contains a broader range of beneficial bacteria and yeast compared to some commercial kefirs. This diversity can impact the health benefits and fermentation success when using store-bought kefir as a starter.
Evaluating Store-Bought Kefir Cultures
When considering using store-bought kefir as a starter, it’s crucial to evaluate the quality and composition of the cultures present in the product. The label on the kefir container can provide valuable information about the live active cultures included. Look for kefir that lists specific strains of bacteria and yeast, as this indicates a higher likelihood of successful fermentation.
The concentration of live active cultures is another important factor. Some brands may include information about the number of colony-forming units (CFUs) per serving, which indicates the quantity of viable microorganisms. Higher CFU counts generally suggest a more potent starter culture, which can enhance the fermentation process.
It’s also essential to consider the diversity of the cultures present in store-bought kefir. Traditional kefir grains contain a wide variety of bacteria and yeast, contributing to the complex flavor and health benefits of kefir. Some commercial kefirs may have a more limited microbial profile, which could affect the fermentation process and the final product’s quality.
The presence of added ingredients, such as sweeteners, flavors, or thickeners, can also impact the effectiveness of store-bought kefir as a starter. These additives may interfere with the fermentation process or alter the microbial balance, leading to inconsistent results. Opt for plain, unsweetened kefir with minimal additives for the best results.
Another consideration is the storage and handling of store-bought kefir. Proper refrigeration is crucial to maintaining the viability of the live active cultures. Kefir that has been exposed to temperature fluctuations or has passed its expiration date may have a reduced number of viable microorganisms, making it less effective as a starter.
Lastly, it’s worth experimenting with different brands of store-bought kefir to find the one that works best as a starter for your homemade kefir. Some brands may have a more robust microbial profile or higher CFU counts, leading to better fermentation results. Keep track of your experiments and note any differences in the final product to refine your process over time.
Steps to Use Store-Bought Kefir as Starter
Using store-bought kefir as a starter for homemade kefir involves several steps to ensure a successful fermentation process. Begin by selecting a high-quality, plain, unsweetened kefir with a high concentration of live active cultures. Freshness is crucial, so choose kefir with the latest expiration date available.
Next, prepare the milk for fermentation. You can use cow’s milk, goat’s milk, or a plant-based milk alternative, depending on your preference. Ensure the milk is at room temperature before adding the store-bought kefir starter. Cold milk can slow down the fermentation process, leading to inconsistent results.
Add the store-bought kefir to the milk at a ratio of approximately 1:10. For example, if you are using one cup of milk, add two tablespoons of store-bought kefir. This ratio provides enough live active cultures to initiate the fermentation process without overwhelming the milk.
Stir the mixture thoroughly to distribute the kefir cultures evenly throughout the milk. Use a non-metallic spoon or whisk, as metal can react with the cultures and potentially inhibit fermentation. Once the mixture is well combined, transfer it to a clean, non-reactive container, such as a glass jar.
Cover the container with a breathable cloth or paper towel secured with a rubber band. This allows air to circulate while preventing contaminants from entering the mixture. Place the container in a warm, draft-free location to ferment for 24-48 hours. The ideal temperature for fermentation is between 68-78°F (20-25°C).
After the fermentation period, check the consistency and taste of the kefir. It should have thickened and developed a tangy flavor. If the kefir has not reached the desired consistency, allow it to ferment for an additional 12-24 hours. Once the kefir is ready, strain out any curds or whey and transfer the finished product to a clean container for storage in the refrigerator.
Potential Challenges and Solutions
Using store-bought kefir as a starter for homemade kefir can present several challenges, but with the right approach, these can be effectively managed. One common issue is inconsistent fermentation, which can result from variations in the microbial content of store-bought kefir. To address this, experiment with different brands and select those with higher CFU counts and diverse cultures.
Another challenge is the potential presence of additives in store-bought kefir, such as sweeteners, flavors, or thickeners. These additives can interfere with the fermentation process, leading to undesirable results. To mitigate this, choose plain, unsweetened kefir with minimal additives and always check the ingredient list before purchasing.
Temperature fluctuations during fermentation can also impact the quality of homemade kefir. Kefir cultures thrive in a stable, warm environment, so ensure the fermentation area maintains a consistent temperature between 68-78°F (20-25°C). Using a thermometer to monitor the temperature can help maintain optimal conditions.
The freshness of store-bought kefir is another critical factor. Older kefir may have a reduced number of viable cultures, leading to weak or incomplete fermentation. Always use the freshest kefir available and store it properly to preserve the live active cultures.
Contamination is a potential risk when making homemade kefir. Ensure all equipment and containers are thoroughly cleaned and sanitized before use. Using non-metallic utensils and containers can also help prevent reactions that could inhibit fermentation. Cover the fermenting kefir with a breathable cloth to protect it from contaminants while allowing air circulation.
Lastly, achieving the desired taste and consistency can be challenging when using store-bought kefir as a starter. The fermentation time may need to be adjusted based on the specific conditions and the type of milk used. If the kefir is too tangy or thick, reduce the fermentation time. Conversely, if it is too mild or thin, extend the fermentation period. Keeping detailed notes on each batch can help refine the process over time.
Ensuring Quality and Safety in Homemade Kefir
Ensuring the quality and safety of homemade kefir is paramount, especially when using store-bought kefir as a starter. Begin by selecting high-quality ingredients, including fresh milk and a reputable brand of store-bought kefir with live active cultures. Avoid kefir with added sweeteners, flavors, or thickeners, as these can interfere with fermentation.
Proper sanitation is crucial to prevent contamination and ensure a successful fermentation process. Clean and sanitize all equipment, containers, and utensils before use. Use non-metallic tools and containers to avoid reactions that could inhibit the growth of beneficial cultures. Cover the fermenting kefir with a breathable cloth to protect it from contaminants while allowing air circulation.
Monitor the fermentation process closely to maintain optimal conditions. The ideal temperature for kefir fermentation is between 68-78°F (20-25°C). Use a thermometer to ensure the fermentation area remains within this range. Temperature fluctuations can impact the quality and consistency of the final product, so maintaining a stable environment is essential.
Taste and texture are important indicators of successful fermentation. Homemade kefir should have a tangy flavor and a slightly thickened consistency. If the kefir has an off smell, unusual taste, or visible mold, discard it immediately, as these are signs of contamination. Properly fermented kefir should be safe to consume and rich in probiotics.
Store the finished kefir in a clean, airtight container in the refrigerator. Refrigeration slows down the fermentation process, preserving the kefir’s quality and extending its shelf life. Consume the kefir within one to two weeks for the best taste and probiotic benefits. Shake the container gently before serving to redistribute any settled solids.
Regularly evaluate the quality of your homemade kefir and adjust the fermentation process as needed. Keep detailed notes on each batch, including the type of milk used, the brand of store-bought kefir, fermentation time, and temperature. This information can help you refine your technique and achieve consistent results over time.
Conclusion:
Using store-bought kefir as a starter for homemade kefir is a feasible option for those looking to enjoy the benefits of kefir while experimenting with the fermentation process. By understanding the basics of store-bought kefir, evaluating its cultures, and following proper fermentation steps, you can create high-quality homemade kefir. Addressing potential challenges and ensuring quality and safety are crucial to achieving the best results. With careful attention to detail and a willingness to experiment, you can successfully use store-bought kefir to make delicious and nutritious homemade kefir.
Read More…
- Kefir: The Champagne of Dairy – A comprehensive study on the health benefits and microbial composition of kefir.
- Making Kefir at Home – A detailed guide on the process of making kefir at home, including troubleshooting tips.
- Probiotic Content in Commercial Kefir – An analysis of the probiotic content in various commercial kefir brands.
- Fermentation Science: Kefir – An in-depth look at the fermentation science behind kefir and its microbial diversity.
- Food Safety in Fermentation – Guidelines on ensuring food safety during the fermentation process, applicable to homemade kefir.