Se hai un abbonamento attivo ACCEDI QUI
Introduction: Kefir, a fermented milk drink, has been cherished for centuries for its rich probiotic content and numerous health benefits. Originating from the Caucasus Mountains, this tangy beverage is not only a delight to the palate but also a boon for gut health. For beginners, making kefir at home can seem daunting, but with the right guidance, it becomes a simple and rewarding process. This article will walk you through everything you need to know to prepare kefir, from selecting the right equipment to the fermentation process.
Introduction to Kefir and Its Health Benefits
Kefir is a fermented milk drink made using kefir grains, which are a combination of bacteria and yeast. These grains ferment the milk, resulting in a tangy, slightly effervescent beverage. Rich in probiotics, kefir is known to support digestive health by promoting a balanced gut microbiome. The probiotics in kefir can help alleviate issues like bloating, constipation, and diarrhea.
In addition to its digestive benefits, kefir is also packed with essential nutrients. It is an excellent source of protein, calcium, and vitamins B12 and K2. These nutrients are crucial for maintaining strong bones, supporting muscle function, and ensuring overall well-being. Regular consumption of kefir can contribute to a balanced diet and a healthy lifestyle.
Kefir is also known for its potential immune-boosting properties. The probiotics and bioactive compounds in kefir can enhance the body’s natural defenses, making it more resilient to infections and illnesses. Some studies suggest that kefir may have anti-inflammatory and antioxidant effects, further supporting its role in promoting health.
For those with lactose intolerance, kefir can be a suitable option. The fermentation process breaks down lactose, making it easier to digest. This means that even individuals who typically avoid dairy can often enjoy kefir without discomfort. However, it’s always best to start with small amounts and monitor your body’s response.
Another notable benefit of kefir is its potential impact on mental health. Emerging research suggests a link between gut health and mental well-being, often referred to as the gut-brain axis. By supporting a healthy gut microbiome, kefir may contribute to improved mood and cognitive function. While more research is needed, the preliminary findings are promising.
Overall, kefir is a versatile and nutritious addition to any diet. Whether you’re looking to improve your digestive health, boost your immune system, or simply enjoy a delicious and refreshing beverage, kefir offers a range of benefits that make it worth incorporating into your routine.
Essential Equipment for Making Kefir at Home
To start making kefir at home, you’ll need a few essential pieces of equipment. First and foremost, you’ll need kefir grains. These can be purchased online or sourced from a friend who makes kefir. It’s important to use live, active kefir grains for the fermentation process to be successful.
Next, you’ll need a clean glass jar. A quart-sized jar is typically sufficient for beginners. Glass is preferred because it doesn’t react with the acidic nature of kefir, ensuring the purity of your final product. Avoid using metal containers, as they can interfere with the fermentation process.
A breathable cover for your jar is also necessary. This can be a piece of cheesecloth, a coffee filter, or a clean kitchen towel secured with a rubber band. The cover allows air to circulate while keeping dust and insects out. Proper airflow is crucial for the fermentation process, so make sure your cover is breathable.
A plastic or wooden spoon is recommended for stirring the kefir grains. Metal utensils can react with the grains and affect their activity. Plastic or wooden spoons are gentle on the grains and help maintain their integrity. Additionally, a plastic strainer is useful for separating the kefir grains from the finished kefir. Metal strainers should be avoided for the same reasons as metal spoons.
You’ll also need a measuring cup to portion out the milk and kefir grains accurately. Precision is important in fermentation, as the ratio of grains to milk can affect the final product. A digital kitchen scale can also be helpful for measuring smaller quantities of kefir grains.
Finally, consider having a secondary container for storing your finished kefir. A glass bottle with a tight-fitting lid is ideal for this purpose. It allows you to store your kefir in the refrigerator, where it will continue to ferment slowly and develop its flavor. Proper storage is essential for maintaining the quality and safety of your homemade kefir.
Selecting the Right Milk for Kefir Fermentation
Choosing the right milk is a crucial step in making kefir. The type of milk you use can significantly impact the flavor, texture, and nutritional content of your kefir. While cow’s milk is the most commonly used, you can also make kefir with goat’s milk, sheep’s milk, or even non-dairy alternatives.
Whole milk is often recommended for beginners because it produces a rich, creamy kefir. The higher fat content in whole milk contributes to a smoother texture and a more satisfying mouthfeel. If you prefer a lighter kefir, you can use low-fat or skim milk, but be aware that the texture may be thinner and less creamy.
Goat’s milk is another excellent option for making kefir. It has a slightly different flavor profile, often described as tangier and more robust than cow’s milk. Goat’s milk is also easier to digest for some people, making it a good alternative for those with sensitivities to cow’s milk. The fermentation process for goat’s milk kefir is similar to that of cow’s milk.
Sheep’s milk, while less common, can also be used to make kefir. It has a higher fat and protein content than cow’s or goat’s milk, resulting in a thicker and richer kefir. Sheep’s milk kefir is particularly nutritious and can be a good option for those looking to maximize the health benefits of their kefir.
For those who prefer non-dairy options, you can make kefir with plant-based milks such as almond milk, coconut milk, or soy milk. However, it’s important to note that non-dairy kefir may not have the same probiotic content as dairy kefir. The fermentation process can be less predictable with plant-based milks, and you may need to experiment to achieve the desired results.
When selecting milk for kefir fermentation, always choose high-quality, fresh milk. Organic and grass-fed options are preferable, as they are free from antibiotics and hormones that can interfere with the fermentation process. Avoid ultra-pasteurized milk, as the high heat used in ultra-pasteurization can denature proteins and inhibit fermentation.
Ultimately, the best milk for kefir is the one that suits your taste preferences and dietary needs. Experiment with different types of milk to find the one that works best for you. Remember, the key to successful kefir fermentation is fresh, high-quality milk and active kefir grains.
Step-by-Step Guide to Preparing Kefir Grains
Preparing kefir grains for fermentation is a straightforward process, but it requires attention to detail to ensure success. Start by placing your kefir grains in a clean glass jar. The amount of grains you use will depend on the quantity of kefir you want to make. A general rule of thumb is to use one tablespoon of kefir grains for every cup of milk.
Next, pour fresh milk over the kefir grains. Make sure the milk is at room temperature, as cold milk can slow down the fermentation process. Stir the mixture gently with a plastic or wooden spoon to ensure the grains are evenly distributed. Cover the jar with a breathable cover, such as cheesecloth or a coffee filter, and secure it with a rubber band.
Place the jar in a warm, draft-free area to ferment. The ideal temperature for kefir fermentation is between 68°F and 78°F (20°C to 25°C). Avoid placing the jar in direct sunlight or near heat sources, as extreme temperatures can affect the fermentation process. Allow the mixture to ferment for 24 to 48 hours, depending on your taste preferences.
During the fermentation period, you may notice the milk thickening and separating into curds and whey. This is a normal part of the process. Gently stir the mixture once or twice a day to help redistribute the grains and promote even fermentation. If the mixture becomes too thick, you can add a little more milk to thin it out.
After the fermentation period, it’s time to strain the kefir. Use a plastic strainer to separate the kefir grains from the liquid kefir. Gently shake the strainer to ensure all the liquid passes through, but be careful not to crush the grains. The strained liquid is your finished kefir, ready to be consumed or stored.
Rinse the kefir grains with fresh, cool water to remove any residual milk. They are now ready to be used for your next batch of kefir. Store the grains in a small amount of milk in the refrigerator if you’re not planning to use them immediately. Properly cared for, kefir grains can be reused indefinitely, providing you with a continuous supply of homemade kefir.
Fermentation Process: Time, Temperature, and Tips
The fermentation process is the heart of kefir-making, and understanding the key factors involved can help you achieve the best results. Time, temperature, and a few helpful tips can make all the difference in your homemade kefir.
The fermentation time for kefir typically ranges from 24 to 48 hours. The exact duration depends on your taste preferences and the ambient temperature. A shorter fermentation time will result in a milder, less tangy kefir, while a longer fermentation time will produce a stronger, more tart flavor. Experiment with different fermentation times to find the one that suits your palate.
Temperature plays a crucial role in the fermentation process. The ideal temperature range for kefir fermentation is between 68°F and 78°F (20°C to 25°C). If the temperature is too low, the fermentation process will slow down, and the kefir may not thicken properly. If the temperature is too high, the fermentation process can speed up too much, leading to over-fermentation and a sour taste.
To maintain a consistent temperature, consider placing your fermentation jar in a warm, draft-free area of your home. Avoid direct sunlight and heat sources, as they can cause temperature fluctuations. If you live in a particularly cold or hot climate, you may need to use a heating pad or a cooler to regulate the temperature.
During fermentation, it’s important to monitor the kefir and make adjustments as needed. Stir the mixture gently once or twice a day to redistribute the grains and promote even fermentation. If you notice the kefir becoming too thick or separating into curds and whey, you can add a little more milk to thin it out and extend the fermentation time.
One common issue that beginners may encounter is over-fermentation. This occurs when the kefir grains consume all the lactose in the milk, resulting in a very sour and thick kefir. To prevent over-fermentation, check the kefir regularly and taste it to determine if it has reached your desired flavor. If it becomes too sour, reduce the fermentation time for your next batch.
Finally, remember that kefir is a living product, and the fermentation process can vary based on factors like the freshness of the milk, the activity of the kefir grains, and the ambient temperature. Be patient and flexible, and don’t be afraid to experiment. With practice, you’ll develop a sense of what works best for your kefir-making process.
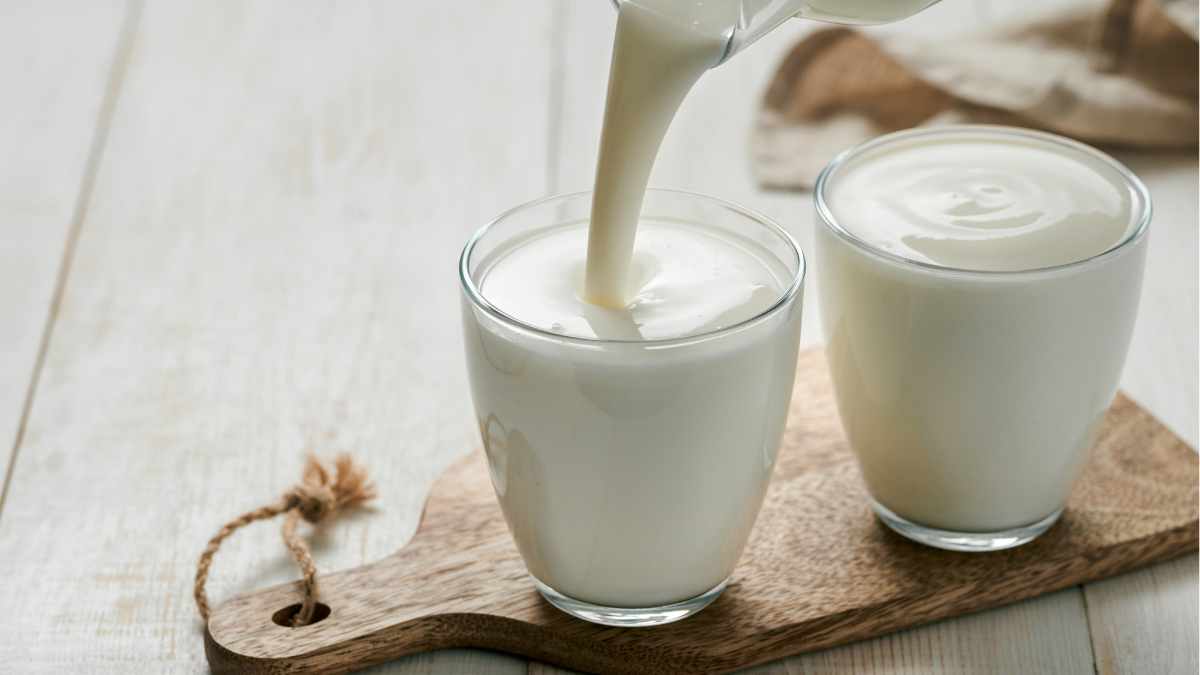
Storing and Consuming Your Homemade Kefir
Once your kefir has reached the desired level of fermentation, it’s time to store and enjoy it. Proper storage is essential to maintain the quality and safety of your homemade kefir. Start by transferring the strained kefir into a clean glass bottle or jar with a tight-fitting lid. This helps preserve the freshness and prevents contamination.
Store your kefir in the refrigerator, where it will continue to ferment slowly. Refrigeration slows down the fermentation process, allowing the kefir to develop its flavor over time. Homemade kefir can be stored in the refrigerator for up to two weeks, but it’s best consumed within the first week for optimal taste and probiotic content.
When you’re ready to consume your kefir, give the bottle a gentle shake to mix any settled solids. Kefir can be enjoyed on its own as a refreshing drink, or you can use it as a base for smoothies, salad dressings, and other recipes. The tangy flavor pairs well with fruits, honey, and spices, offering endless possibilities for culinary creativity.
If you find the taste of plain kefir too strong, you can sweeten it with a little honey, maple syrup, or agave nectar. Adding fresh or frozen fruits can also enhance the flavor and provide additional nutrients. Experiment with different combinations to find your favorite way to enjoy kefir.
For those with lactose intolerance, it’s important to start with small amounts of kefir and gradually increase your intake. The fermentation process reduces the lactose content, making kefir easier to digest, but individual tolerance levels can vary. Monitor your body’s response and adjust your consumption accordingly.
If you have leftover kefir grains that you don’t plan to use immediately, you can store them in a small amount of milk in the refrigerator. This will keep the grains active and ready for your next batch. For longer storage, you can freeze the grains in milk or dry them for future use. Properly stored kefir grains can last for several months, ensuring a continuous supply of homemade kefir.
Conclusion: Making kefir at home is a rewarding and healthful endeavor that allows you to enjoy the numerous benefits of this probiotic-rich beverage. By understanding the basics of kefir fermentation, selecting the right milk, and following the proper steps, you can create delicious and nutritious kefir tailored to your taste preferences. With practice and patience, you’ll become proficient in kefir-making and enjoy the satisfaction of crafting your own fermented drinks.
Read More…
-
Cultures for Health: How to Make Milk Kefir
- A comprehensive guide on making milk kefir, including tips and troubleshooting advice.
-
- An informative resource on the history, benefits, and types of kefir.
-
The Kitchn: How To Make Milk Kefir
- A step-by-step tutorial with photos to help you make kefir at home.
-
Harvard T.H. Chan School of Public Health: The Nutrition Source – Fermented Foods
- An overview of the health benefits of fermented foods, including kefir.
-
Healthline: 9 Evidence-Based Health Benefits of Kefir
- A detailed article on the scientifically proven health benefits of kefir.