Introduction:
Producing kefir from store-bought kefir is a rewarding and cost-effective way to enjoy this probiotic-rich beverage at home. Kefir, a fermented milk drink, is known for its numerous health benefits, including improved digestion and a strengthened immune system. This article will guide you through the process of making your own kefir using store-bought kefir as a starter, covering everything from understanding the basics of kefir to troubleshooting common issues and storing your homemade kefir.
Understanding Kefir: Basics and Benefits
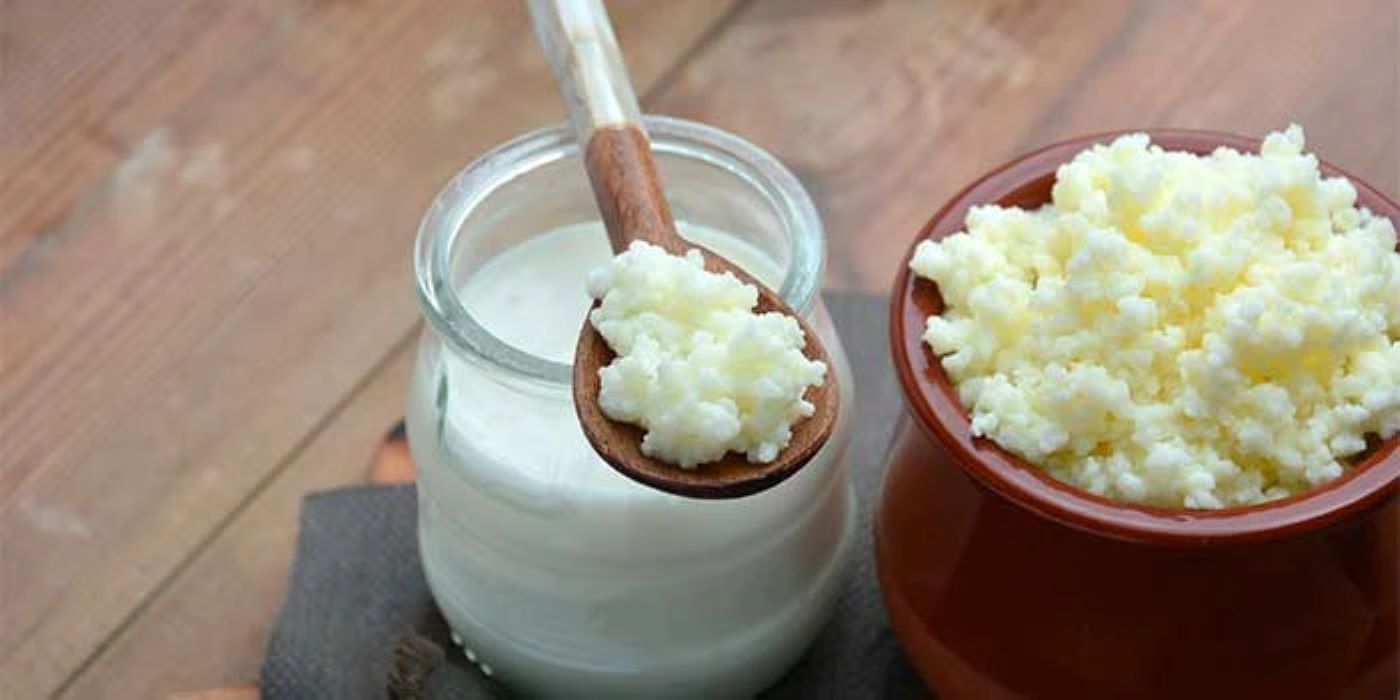
Kefir is a fermented milk drink that originates from the Caucasus region. It is made by adding kefir grains, which are a combination of bacteria and yeast, to milk. The fermentation process results in a tangy, slightly effervescent beverage that is rich in probiotics, vitamins, and minerals.
One of the primary benefits of kefir is its probiotic content. Probiotics are live microorganisms that provide numerous health benefits when consumed in adequate amounts. They help maintain a healthy balance of gut bacteria, which is essential for proper digestion and overall health.
In addition to probiotics, kefir is also a good source of essential nutrients, including calcium, protein, and B vitamins. These nutrients are important for maintaining strong bones, supporting muscle function, and promoting overall well-being.
Kefir has been shown to have antimicrobial properties, which can help protect against harmful bacteria and infections. This is particularly beneficial for individuals with weakened immune systems or those prone to infections.
Regular consumption of kefir has been linked to improved digestion and reduced symptoms of gastrointestinal disorders, such as irritable bowel syndrome (IBS) and lactose intolerance. The probiotics in kefir can help break down lactose, making it easier for lactose-intolerant individuals to digest.
Finally, kefir may have anti-inflammatory and antioxidant properties, which can help reduce inflammation and protect against oxidative stress. This can contribute to overall health and may help prevent chronic diseases.
Selecting the Right Store-Bought Kefir
When choosing a store-bought kefir to use as a starter for your homemade kefir, it is important to consider several factors. First, look for a kefir that contains live and active cultures. This information is usually indicated on the label. Live cultures are essential for the fermentation process and will ensure that your homemade kefir is rich in probiotics.
Next, consider the type of milk used to make the kefir. While cow’s milk is the most common, kefir can also be made from goat’s milk, sheep’s milk, or even plant-based milk alternatives such as coconut or almond milk. Choose a milk type that suits your dietary preferences and needs.
It is also important to check the ingredient list for any added sugars, flavors, or preservatives. These additives can interfere with the fermentation process and may affect the taste and quality of your homemade kefir. Opt for plain, unsweetened kefir with minimal ingredients.
Another factor to consider is the fat content of the kefir. Full-fat kefir tends to produce a creamier and richer final product, while low-fat or fat-free kefir may result in a thinner consistency. Choose the fat content based on your personal preference.
Lastly, pay attention to the expiration date of the store-bought kefir. Fresh kefir with a longer shelf life will have more active cultures, which are crucial for successful fermentation. Avoid using kefir that is close to or past its expiration date.
By selecting the right store-bought kefir, you can ensure that your homemade kefir will be of high quality and packed with beneficial probiotics.
Essential Equipment for Kefir Production
Producing kefir at home requires some basic equipment to ensure a smooth and successful fermentation process. The following items are essential for making your own kefir:
-
Glass Jar: A large glass jar with a wide mouth is ideal for fermenting kefir. Glass is non-reactive and will not interfere with the fermentation process. Avoid using metal containers, as they can react with the kefir grains and affect the quality of the final product.
-
Plastic or Wooden Spoon: Use a plastic or wooden spoon to stir the kefir. Metal utensils can react with the kefir grains and potentially harm the beneficial bacteria and yeast.
-
Plastic or Nylon Strainer: A plastic or nylon strainer is necessary for separating the kefir grains from the finished kefir. Metal strainers should be avoided for the same reasons as metal utensils.
-
Cheesecloth or Coffee Filter: Cover the jar with a cheesecloth or coffee filter to allow airflow while keeping out dust and contaminants. Secure it with a rubber band or string.
-
Measuring Cups and Spoons: Accurate measurements are important for maintaining the right balance of milk and kefir grains. Use measuring cups and spoons to ensure consistency.
-
Storage Containers: Once the kefir is ready, you will need airtight containers for storing the finished product in the refrigerator. Glass bottles or jars with lids are ideal for this purpose.
Having the right equipment on hand will make the process of producing kefir at home more efficient and enjoyable.
Step-by-Step Guide to Producing Kefir
Producing kefir from store-bought kefir is a straightforward process that involves a few simple steps. Follow this step-by-step guide to make your own kefir at home:
-
Prepare the Equipment: Ensure that all your equipment is clean and dry. This will help prevent contamination and ensure a successful fermentation process.
-
Add Kefir Grains to Milk: Pour the desired amount of milk into a glass jar. Add a small amount of store-bought kefir to the milk. A ratio of 1 tablespoon of kefir per cup of milk is a good starting point. Stir gently with a plastic or wooden spoon to mix the kefir into the milk.
-
Cover and Ferment: Cover the jar with a cheesecloth or coffee filter and secure it with a rubber band. Place the jar in a warm, dark place, such as a kitchen cabinet, and let it ferment for 24 to 48 hours. The fermentation time will depend on the temperature and your taste preferences. Warmer temperatures will speed up the fermentation process.
-
Check for Doneness: After 24 hours, check the kefir for doneness. The milk should have thickened and developed a tangy flavor. If it is not to your liking, allow it to ferment for another 12 to 24 hours.
-
Strain the Kefir: Once the kefir has reached the desired consistency and flavor, use a plastic or nylon strainer to separate the kefir grains from the finished kefir. Gently stir the kefir to help the liquid pass through the strainer.
-
Store the Finished Kefir: Transfer the finished kefir to airtight containers and store it in the refrigerator. The kefir will continue to ferment slowly in the refrigerator, so it is best to consume it within a week for optimal freshness and flavor.
By following these steps, you can produce your own kefir at home and enjoy the health benefits of this probiotic-rich beverage.
Troubleshooting Common Kefir Issues
While producing kefir at home is generally straightforward, you may encounter some common issues. Here are some troubleshooting tips to help you address these problems:
-
Thin Kefir: If your kefir is too thin, it may not have fermented long enough. Allow it to ferment for an additional 12 to 24 hours. Alternatively, you can increase the amount of kefir grains or store-bought kefir used in the next batch.
-
Separation: If your kefir separates into curds and whey, it may have over-fermented. Stir the kefir gently to recombine the curds and whey, or strain the kefir and use the whey in smoothies or as a base for soups.
-
Off-Flavors: If your kefir has an off-flavor, it may be due to contamination or improper fermentation conditions. Ensure that all equipment is clean and that the fermentation environment is warm and dark. Avoid using metal utensils or containers.
-
Mold Growth: Mold growth on kefir is rare but can occur if the environment is too warm or if the equipment is not properly sanitized. Discard any kefir with mold and start a new batch with fresh kefir grains and clean equipment.
-
Slow Fermentation: If your kefir is fermenting slowly, it may be due to low temperatures. Move the jar to a warmer location or wrap it in a towel to maintain a consistent temperature. You can also increase the amount of kefir grains or store-bought kefir used.
-
Grain Health: If your kefir grains are not growing or appear unhealthy, they may need more nutrients. Try using whole milk instead of low-fat or fat-free milk, and ensure that the grains are not exposed to metal utensils or containers.
By addressing these common issues, you can ensure that your kefir production process is smooth and successful.
Storing and Using Your Homemade Kefir
Once you have produced your homemade kefir, proper storage is essential to maintain its quality and freshness. Here are some tips for storing and using your kefir:
-
Refrigeration: Store the finished kefir in airtight containers in the refrigerator. Kefir will continue to ferment slowly in the refrigerator, so it is best to consume it within a week for optimal flavor and freshness.
-
Freezing: If you have a surplus of kefir, you can freeze it for later use. Pour the kefir into ice cube trays or freezer-safe containers and freeze. Thaw the kefir in the refrigerator before using it. Note that the texture may change slightly after freezing, but the probiotic benefits will remain intact.
-
Using Kefir in Recipes: Kefir can be used in a variety of recipes, including smoothies, salad dressings, and baked goods. Its tangy flavor adds a unique twist to dishes and provides a probiotic boost. Substitute kefir for yogurt or buttermilk in recipes for added health benefits.
-
Flavoring Kefir: If you prefer flavored kefir, you can add fruit, honey, or spices to your homemade kefir. Blend the kefir with your desired flavorings and refrigerate for a few hours to allow the flavors to meld.
-
Maintaining Kefir Grains: If you plan to continue making kefir, it is important to maintain the health of your kefir grains. Rinse the grains with filtered water between batches and store them in a small amount of milk in the refrigerator if you are taking a break from kefir production.
-
Sharing Kefir Grains: Kefir grains multiply over time, so you may find yourself with more grains than you need. Share excess grains with friends and family or use them to start new batches of kefir.
By following these storage and usage tips, you can enjoy the benefits of homemade kefir and incorporate it into your daily routine.
Conclusion:
Producing kefir from store-bought kefir is a simple and rewarding process that allows you to enjoy the numerous health benefits of this probiotic-rich beverage at home. By understanding the basics of kefir, selecting the right store-bought kefir, using the essential equipment, following a step-by-step guide, troubleshooting common issues, and properly storing and using your homemade kefir, you can ensure a successful and enjoyable kefir-making experience.
Read More…
- The Benefits of Kefir: A comprehensive overview of the health benefits of kefir, including its probiotic content and nutritional value.
- How to Make Kefir: A detailed guide on making kefir at home, including step-by-step instructions and troubleshooting tips.
- Kefir FAQ: Answers to common questions about kefir, including information on kefir grains, fermentation, and storage.
- Kefir and Gut Health: An article discussing the impact of kefir on gut health and its potential benefits for digestive disorders.
- Kefir Recipes: A collection of delicious recipes that incorporate kefir, from smoothies to salad dressings and baked goods.