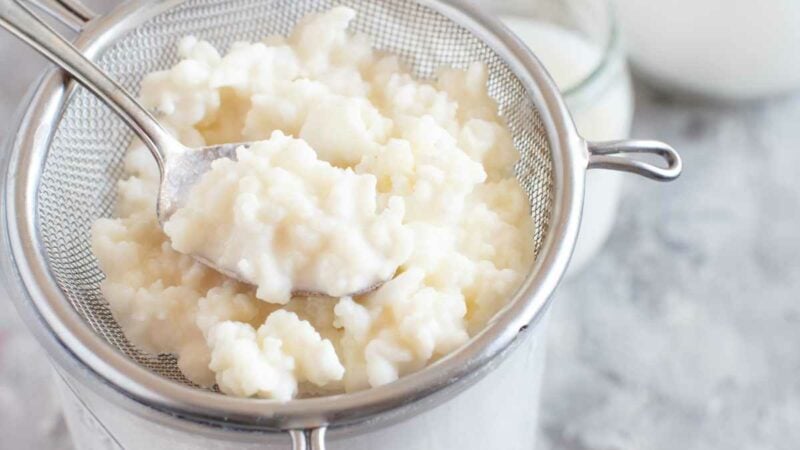
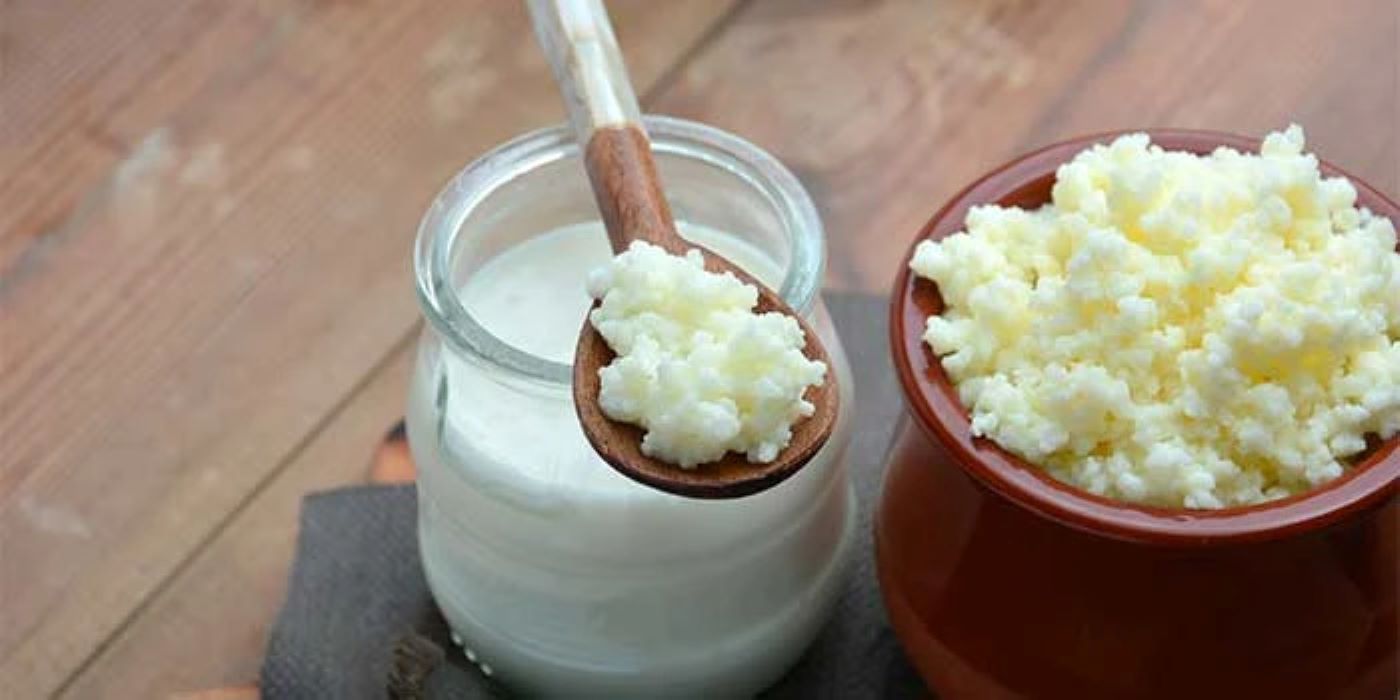


Introduction: In recent years, kefir has gained significant popularity due to its numerous health benefits and versatility. While many people purchase kefir from stores, there is a growing interest in culturing kefir at home using store-bought kefir as a starter. This method not only ensures a continuous supply of fresh kefir but also allows for customization according to personal taste preferences. This article will guide you through the process of using store-bought kefir for home culturing, ensuring you achieve the best results.
Introduction to Store-Bought Kefir for Culturing
Store-bought kefir is a convenient and accessible option for those looking to delve into the world of home culturing. It is a fermented milk drink that contains a symbiotic culture of bacteria and yeast (SCOBY), which is responsible for its probiotic properties. Using store-bought kefir as a starter culture is an excellent way to ensure that you have a reliable source of beneficial microorganisms.
One of the primary advantages of using store-bought kefir for culturing is its consistency. Commercial kefir producers adhere to strict quality control measures, ensuring that the kefir you purchase contains a stable and active culture. This reliability is crucial for successful home culturing, as it reduces the risk of contamination and ensures a consistent end product.
Additionally, store-bought kefir is widely available in most grocery stores, making it an accessible option for beginners. It eliminates the need to source kefir grains, which can sometimes be challenging to find. Moreover, using store-bought kefir allows you to experiment with different brands and varieties to find the one that best suits your taste preferences and culturing needs.
When selecting store-bought kefir for home culturing, it is essential to choose a product that contains live and active cultures. This information is typically indicated on the packaging. Avoid kefir that has been pasteurized after fermentation, as the heat treatment can kill the beneficial microorganisms necessary for culturing.
In summary, store-bought kefir provides a convenient, reliable, and accessible option for home culturing. Its consistency and availability make it an ideal choice for both beginners and experienced kefir enthusiasts looking to maintain a continuous supply of this probiotic-rich beverage.
Selecting the Best Store-Bought Kefir
Choosing the right store-bought kefir is crucial for successful home culturing. Not all kefir products are created equal, and selecting a high-quality kefir with live and active cultures will significantly impact the outcome of your home culturing efforts.
Firstly, check the label for information about live and active cultures. This is a key indicator that the kefir contains the necessary microorganisms for fermentation. Look for phrases such as "contains live cultures" or "live and active cultures" on the packaging. Avoid products that do not explicitly state this information, as they may have been pasteurized after fermentation, rendering the cultures inactive.
Secondly, consider the type of milk used in the kefir. Traditional kefir is made from cow’s milk, but there are also options available made from goat’s milk, sheep’s milk, and even non-dairy alternatives like coconut or almond milk. The type of milk can affect the flavor and texture of the kefir, so choose one that aligns with your preferences and dietary needs.
Thirdly, take note of the ingredient list. High-quality kefir should have a short and simple ingredient list, typically consisting of milk and live cultures. Avoid products with added sugars, artificial flavors, or preservatives, as these can interfere with the fermentation process and diminish the health benefits of the kefir.
Another factor to consider is the brand reputation. Established and reputable brands are more likely to produce consistent and high-quality kefir. Reading reviews and seeking recommendations from trusted sources can help you identify reliable brands.
Price can also be an indicator of quality. While it is not always the case, cheaper kefir products may cut corners in terms of ingredients and fermentation processes. Investing in a slightly more expensive, high-quality kefir can yield better results in your home culturing endeavors.
Lastly, consider the packaging. Kefir should be stored in opaque containers to protect it from light, which can degrade the quality of the cultures. Ensure that the packaging is intact and that the kefir has been stored properly in the refrigerated section of the store.
Preparing Your Workspace for Kefir Culturing
Creating an optimal environment for kefir culturing is essential to ensure the success and safety of your homemade kefir. Proper preparation of your workspace will minimize the risk of contamination and provide the best conditions for fermentation.
Begin by thoroughly cleaning your workspace. Ensure that all surfaces, utensils, and containers that will come into contact with the kefir are clean and sanitized. This step is crucial to prevent the introduction of unwanted bacteria or mold, which can compromise the fermentation process.
Next, gather all the necessary equipment. You will need a clean glass jar with a lid, a non-metal stirring utensil (such as a wooden or plastic spoon), a fine mesh strainer, and a clean cloth or paper towel. Avoid using metal utensils or containers, as they can react with the acidic kefir and affect the fermentation process.
Temperature control is another important factor. Kefir cultures best at room temperature, ideally between 20°C to 25°C (68°F to 77°F). Ensure that your workspace maintains a consistent temperature within this range. Avoid placing the kefir jar in direct sunlight or near heat sources, as extreme temperatures can harm the cultures.
Proper ventilation is also essential. While kefir ferments, it produces carbon dioxide, which needs to escape. Cover the jar with a clean cloth or paper towel secured with a rubber band instead of a tight lid. This allows for airflow while preventing contaminants from entering the jar.
Labeling your jars is a helpful practice, especially if you plan to culture multiple batches. Include the date and type of kefir used as the starter. This will help you track the fermentation time and identify any variations in the process.
Finally, ensure that your hands are clean before handling the kefir and equipment. Wash your hands thoroughly with soap and water to reduce the risk of introducing unwanted microorganisms. Maintaining a clean and organized workspace is key to successful kefir culturing.
Step-by-Step Guide to Culturing Kefir at Home
Culturing kefir at home using store-bought kefir as a starter is a straightforward process. Follow these steps to ensure a successful fermentation and enjoy a continuous supply of homemade kefir.
-
Prepare the Starter Kefir: Begin by shaking the store-bought kefir bottle to ensure the cultures are evenly distributed. Pour a small amount (about 1/4 cup) of the store-bought kefir into a clean glass jar. This will serve as your starter culture.
-
Add Fresh Milk: Pour fresh milk into the jar with the starter kefir. The ratio of starter kefir to fresh milk should be approximately 1:10. For example, if you used 1/4 cup of starter kefir, add 2.5 cups of fresh milk. Ensure the milk is at room temperature to promote optimal fermentation.
-
Mix and Cover: Stir the mixture gently with a non-metal utensil to combine the starter kefir and fresh milk. Cover the jar with a clean cloth or paper towel secured with a rubber band. This allows for airflow while preventing contaminants from entering the jar.
-
Fermentation: Place the jar in a warm, draft-free area with a consistent temperature between 20°C to 25°C (68°F to 77°F). Allow the mixture to ferment for 24 to 48 hours. The fermentation time can vary depending on the temperature and desired taste. Check the kefir periodically to monitor its progress.
-
Strain and Store: Once the kefir has thickened and has a tangy taste, it is ready to be strained. Use a fine mesh strainer to separate the liquid kefir from any curds or grains. Transfer the strained kefir to a clean glass jar with a lid and store it in the refrigerator. The kefir will continue to ferment slowly in the fridge, developing more flavor over time.
-
Repeat the Process: To maintain a continuous supply of kefir, reserve a small amount of your homemade kefir as a starter for the next batch. Repeat the process by adding fresh milk to the reserved kefir and following the same steps. This cycle can be repeated indefinitely, ensuring you always have fresh kefir on hand.
By following these steps, you can successfully culture kefir at home using store-bought kefir as a starter. Enjoy the benefits of homemade kefir and experiment with different fermentation times and milk types to find your perfect blend.
Troubleshooting Common Kefir Culturing Issues
While culturing kefir at home is generally straightforward, you may encounter some common issues. Understanding these problems and their solutions will help you achieve consistent and high-quality kefir.
One common issue is slow fermentation. If your kefir is not thickening or developing a tangy taste within the expected time frame, it may be due to low temperatures. Ensure that your workspace maintains a consistent temperature between 20°C to 25°C (68°F to 77°F). If necessary, move the jar to a warmer location or wrap it in a towel to retain heat.
Another issue is over-fermentation, which can result in a sour and overly thick kefir. This typically occurs when the fermentation time is too long or the temperature is too high. To prevent over-fermentation, monitor the kefir closely and strain it as soon as it reaches your desired consistency and taste. If over-fermentation occurs, you can dilute the kefir with fresh milk to balance the flavor.
Contamination is a serious concern in kefir culturing. Signs of contamination include mold growth, off smells, or unusual colors. To prevent contamination, ensure that all equipment and surfaces are thoroughly cleaned and sanitized. Use fresh, high-quality ingredients and avoid exposing the kefir to contaminants. If contamination occurs, discard the batch and start anew with clean equipment and fresh ingredients.
Separation of curds and whey is another common issue. This can happen if the kefir is left to ferment for too long or if the milk used has a high fat content. While separation is not harmful, it can affect the texture and taste of the kefir. To remedy this, stir the kefir gently to recombine the curds and whey, or strain the kefir to remove excess whey.
If your kefir has an off taste or smell, it may be due to the quality of the milk or the starter kefir. Ensure that you are using fresh, high-quality milk and a reliable store-bought kefir with live and active cultures. Avoid using milk that is close to its expiration date, as it can affect the fermentation process.
Lastly, if you notice that your kefir grains are not growing or multiplying, it may indicate that the cultures are not active. This can happen if the store-bought kefir used as a starter was pasteurized after fermentation. To resolve this, switch to a different brand of store-bought kefir that explicitly states it contains live and active cultures.
By addressing these common issues, you can ensure successful kefir culturing and enjoy a continuous supply of high-quality homemade kefir.
Storing and Using Your Homemade Kefir
Proper storage and utilization of your homemade kefir are essential to maintain its quality and maximize its benefits. Here are some tips on how to store and use your kefir effectively.
Once your kefir has fermented to your desired taste and consistency, transfer it to a clean glass jar with a lid. Store the jar in the refrigerator to slow down the fermentation process and preserve the kefir’s freshness. Homemade kefir can typically be stored in the refrigerator for up to two weeks.
If you have a large batch of kefir and want to extend its shelf life, consider freezing it. Pour the kefir into ice cube trays and freeze until solid. Transfer the kefir cubes to a freezer-safe bag or container. Frozen kefir can be stored for several months and can be thawed as needed for use in smoothies, baking, or other recipes.
When using your homemade kefir, there are numerous culinary applications to explore. Kefir can be enjoyed on its own as a refreshing and probiotic-rich beverage. It can also be used as a base for smoothies, salad dressings, and marinades. The tangy flavor of kefir pairs well with fruits, vegetables, and herbs, making it a versatile ingredient in both sweet and savory dishes.
Kefir can also be used as a substitute for buttermilk or yogurt in baking recipes. Its acidity helps to tenderize baked goods, resulting in a moist and flavorful end product. Try using kefir in pancakes, muffins, or bread recipes for a unique twist.
In addition to culinary uses, kefir can also be used in skincare. Its probiotic properties can benefit the skin by promoting a healthy microbiome. Use kefir as a facial mask by applying a thin layer to clean skin and leaving it on for 10-15 minutes before rinsing off with warm water. The lactic acid in kefir can help exfoliate and brighten the skin.
Lastly, remember to reserve a small amount of your homemade kefir as a starter for the next batch. This will ensure a continuous supply of fresh kefir and allow you to maintain the fermentation cycle.
By storing and using your homemade kefir effectively, you can enjoy its numerous health benefits and culinary versatility.
Conclusion: Culturing kefir at home using store-bought kefir as a starter is a rewarding and cost-effective way to enjoy this probiotic-rich beverage. By selecting high-quality kefir, preparing your workspace, following a step-by-step guide, troubleshooting common issues, and properly storing and using your homemade kefir, you can ensure a successful and continuous supply of fresh kefir. Experiment with different milk types and fermentation times to find your perfect blend and enjoy the numerous health benefits and culinary applications of homemade kefir.
Read More…
- Cultures for Health
- A comprehensive guide on making milk kefir, including troubleshooting tips and recipes.
- Kefir.net
- Detailed information on the benefits of kefir, how to make it at home, and its various uses.
- The Kitchn
- Step-by-step instructions on making milk kefir with helpful photos and tips.
- Nourished Kitchen
- An in-depth article on milk kefir, including its health benefits and how to make it at home.
- Yemoos Nourishing Cultures
- A resource for kefir enthusiasts with detailed guides on making and troubleshooting milk kefir.